Archives
Whenever You are able to open DVD or CD-Rom Drive if the CD-rom drive on your desktop computer or laptop does not open when you push the button on the drive to eject the CD. You can manually open your computer's DVD or CD-rom drive using a paper clip when the computer is turned off.

- Turn off your computer (and unplug it, just in case).
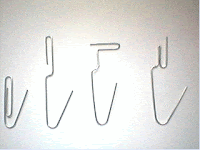
- Get a paper clip and unbend it so most of the paper clip is straightened out.
- Now locate a small pin-sized hole on the front of the DVD or CD-rom drive (it's NOT the large headphone jack).
- Apply pressure gently and work the paper clip around until the CD tray opens up.
- Now grab the CD tray on either side and pull the tray out the rest of the way (then remove any CD that may have been stuck in the drive).
Note: The drive that I had to unjam seemed to be more stuck than I anticipated, so I actually also needed to use a small screw driver to pry open the drive, while pushing the paper clip into the small hole on the CD-rom drive. I almost broke the front of the CD tray off while doing this, so definitely be careful when prying open the tray door. But since the door did not open when just using the paper clip technique, I had to improvise a little and use a screw driver for a little more leverage.
First things first!
We are about to change system files, because the hard drive icon is stored in a system file called imageres.dll. So, always make your backups. Also, get familiar with the command prompt. I can’t stress enough how important it is. If you don’t know the basic command prompt commands, first go do some research on this. Search for examples of cd, dir, runas, copy, rename and other basic commands.
- Download Resource Editor for Windows 7 by following link:
The current version of ResEdit is 1.5.4. You can dow
In order to install Windows 7 shell themes manually, you will have to replace the shell32.dll. You basically can follow our guide that explains how to replace the explorer.exe file, but I wanted to give some very precise instructions for replacing this particular file.

The easiest and shortest way to replace the explorer.exe and any other system files is to download a registry hack that will add the option Take Ownership to your right-click context menu.
Download this script: Download TakeOwnership.zip Or Mirror link1, Mirror link2 and double-click on the .reg (registry) file to add an option “Take Ownership” to your contextual menu (the right-click menu).
Sometimes, you might want to clear the icon cache in Windows 7. You could probably just restart, but if you want to do it like pros, then here’s a quick tutorial how to clear the icon cache without restarting.

Trivia: The icon cache is a database file that is usually very small, about 5MB.
C:\Users\[insertyourusername]\AppData\Local
So, basically just open the folder above, make a copy of the file IconCache.db and delete the original one. Now restart your PC or end the process explorer.exe and restart it again.
Open up the task manager via CTRL + ALT + DEL and go to the tab processes:


Trivia: The icon cache is a database file that is usually very small, about 5MB.
Icon Cache DB Location
Windows has a file where it stores your icon cache. The file name is “IconCache.db” and can be found at the following location:C:\Users\[insertyourusername]\AppData\Local
So, basically just open the folder above, make a copy of the file IconCache.db and delete the original one. Now restart your PC or end the process explorer.exe and restart it again.
Open up the task manager via CTRL + ALT + DEL and go to the tab processes:


